
FMT AxiomEPM Windows Installation Guide
Prerequisites
New Axiom FMT users need to contact the FMT Administrator at FMTsupport gwu [dot] edu to activate their FMT login. Once your login is activated, proceed to the software requirements below.
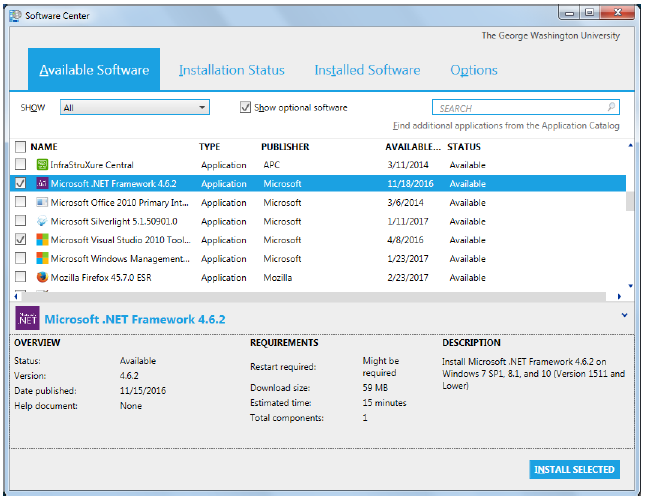
The following items are required to run the AxiomEPM Excel Client. These items are available in the Software Center on Division of IT managed computers. If your computer is not managed by the Division of IT, please contact your local IT department for support with the prerequisites.
- Internet Explorer 9 or higher, Google Chrome 26 or higher, Firefox 5 or higher
- Microsoft .NET Framework 4.5.2
- Microsoft Visual Studio Tools Runtime
If you require need assistance installing these items, please contact the IT Support Center at 202‐994‐4948 or at ithelpgwu [dot] edu.
Installation Steps
Please install the AxiomEPM Excel Client using the instructions below:
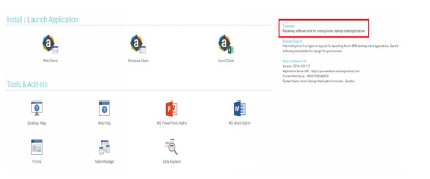
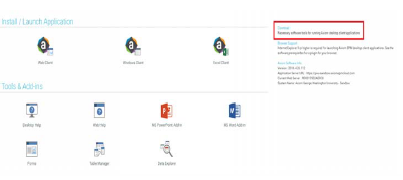
- Visit https://gwu.axiomepmcloud.com/. Log in using your netid and netid password.
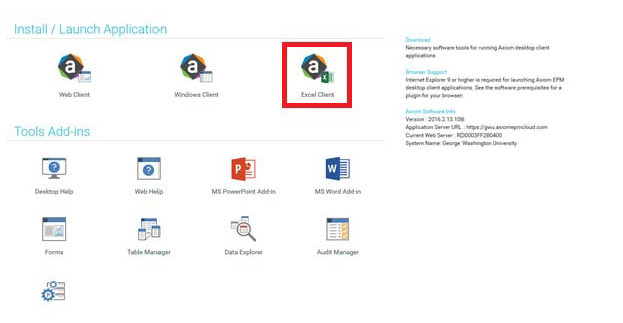
- If you are using Internet Explorer, click on the Excel Client link and it will run the
Axiom.UI.Start.application on your computer. Go to Internet Explorer Installation Steps. - If you are using Chrome, you will need to install an additional extension to allow the
Axiom.UI.Start.application to run properly. Go to Chrome - Add-on Installation Steps. - If you are using Firefox, you will need to install an additional extension to allow the
Axiom.UI.Start.application to run properly. Go to Firefox ‐ Add‐on Installation Steps.
Internet Explorer Installation Steps
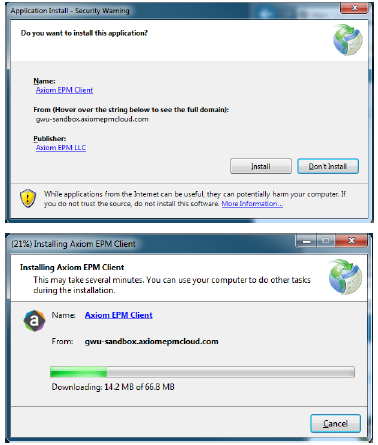
- Click Install to install the AxiomEPM Excel Client. Once installed, the program will automatically launch.
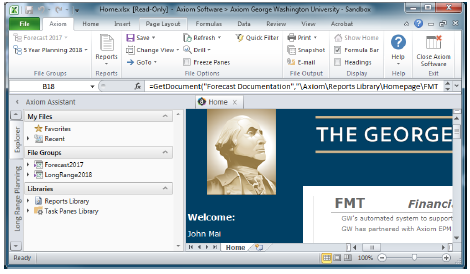
- The program will automatically start after installation completes. Confirm that the Excel Client has successfully launched (see image below).
- Once installed, users can re‐launch the AxiomEPM Excel Client by visiting
https://gwu.axiomepmcloud.com/, logging in using their netid and netid password, and clicking on
Excel Client.
Chrome ‐ Add‐on Installation Steps
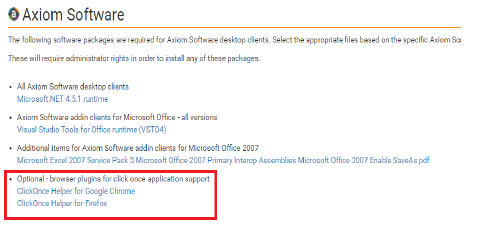
- Click on the Download link on the right hand menu.
- Click on the ClickOnce Helper for Google Chrome link:
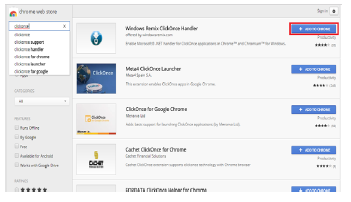
- Click the “+ ADD TO CHROME” button for the “Windows Remix ClickOnce Handler” extension to add it to your chrome browser.
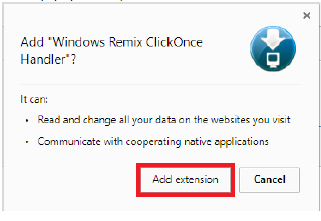
- On the pop up window, click “Add Extension”:
- Go to Chrome and Firefox Installation Steps (continued) to complete installation.
Firefox ‐ Add‐on Installation Steps
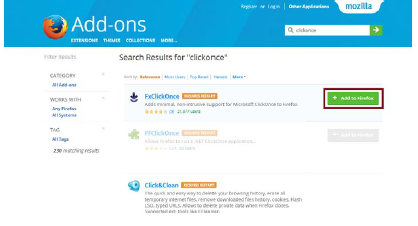
- Click on the Download link on the right hand menu.
- Click on the ClickOnce Helper for Firefox link:

- Hover over the “FxClickOnce” add‐on at the top and click the “+ Add to Firefox” button that appears to the right of it.
- Click install on the pop up window:
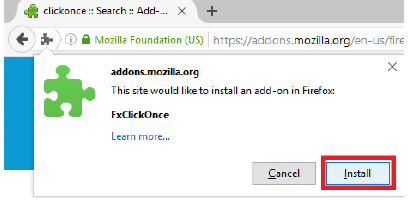
- Firefox will then ask you to restart the browser. Click Restart Now:

- Once the browser reboots, navigate back to https://gwu.axiomepmcloud.com/. Proceed to Chrome and Firefox Installation Steps (continued) to complete the installation.
Chrome and Firefox Installation Steps (continued)
- After the add‐on is installed, navigate back to https://gwu.axiomepmcloud.com/ and log back with your netID and password.
- Click on the Excel Client to launch the installer.
- Click Install to install the AxiomEPM Excel Client. Once installed, the program will automatically launch.
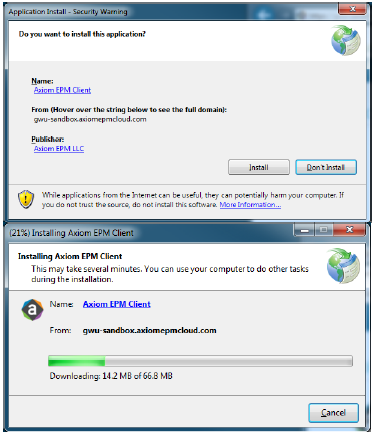
4. The program will automatically start after installation completes. Confirm that the Excel Client has successfully launched (see image). Once installed, users can re‐launch the AxiomEPM Excel Client by visiting https://gwu.axiomepmcloud.com/, logging in using their netid and netid password, and clicking
on Excel Client.
